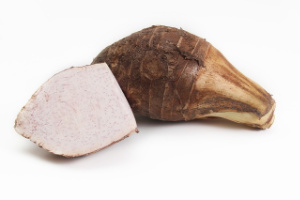
Taro is no stranger to Asian cuisine. From taro leaves to its roots, consuming taro has been around since ancient times.
Taro is abundant in Asia and can be easily found in Asian markets here in the States. While shopping in the snack aisle, you may come across taro chips in select grocery stores like Whole Foods and Amazon. You may also be surprised that they are insanely pricy. $6 for a 6 oz bag indeed!
Taro chips are super easy to make and it offers a variety of health benefits.
Taro root health benefits:
Taro root is loaded with nutrients including calcium, folate, protein, iron, antioxidants, vitamin C, and much more. Perhaps the richest quality is its high fiber content. My son tends to be on the constipated end and I do see some alleviation after he’s had some of these crunchy taro chips.
Taro contains more potassium than its cousin root vegetables such as sweet potatoes and yams. Consuming taro root regularly can help the body expel excess sodium and lower blood pressure.
Other amazing benefits of consuming taro roots include enhancing skin complexion, boosting the immune system, strengthening the eyes, and increasing circulation.
We always have these homemade taro chips around the house. We love dipping these homemade taro chips in salsa and guacamole. These are also great snacks for babies and toddlers!

This post may contain affiliate links, which means I’ll receive a commission if you purchase through my link, at no extra cost to you. Please read full disclosure here.
Recipe Notes:
The taros I bought from our local Asian grocery store are pre-peeled and sealed in vacuum bags. Try to buy pre-peeled ones if you can since it is said that taro skin contains irritating ingredients.
Some people may have an allergic reaction when peeling the skin with bare hands. Use gloves when peeling to avoid direct contact with the taro’s outer skin.
Here’s what you’ll need:
- 1 medium-sized taro root (~1 pound), peeled
- 2 Tbs olive oil
- sea salt
Here’s how:
- Preheat the oven to 350°F.
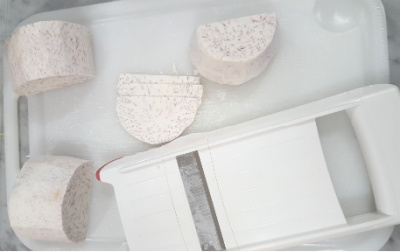
- Peel taro and thinly slice using a vegetable slicer.

- 3. Place parchment paper onto a baking pan and thinly coat with 1/2 Tbs olive oil.


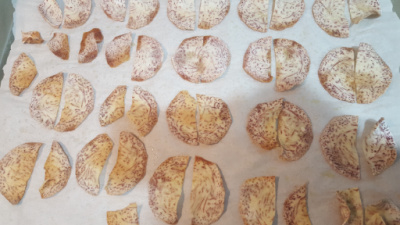
- 4. Carefully place taro slices onto the baking pan. Do not overlap taro slices.
- 5. Evenly coat taro slices with olive oil.

- 6. Bake for 30 minutes or until taro chips turn light brown.
- 7. Sprinkle sea salt flakes (we love the Maldon sea salt flakes) while taro chips are still hot.

- 8. Cool and enjoy!
Final notes on taro chips recipe
These taro chips are the crunchiest when fresh. Storing in seal tight container at room temperature will keep it fresh for about a week. In our house, it never made it to the second day 😋
Want more family-friendly recipes? Check out almond crisps and no-bake protein bites recipe!
The baked taro chips can be stored in an air-tight container for about 3 days until they start to loose their crispiness.
Ingredients
Instructions
Notes

