

Easily create a DIY baby milk bath at home
Looking for a way to take some adorable baby pictures without spending a fortune on a professional photographer? Try a DIY baby milk bath!
It’s easy to do and the results are simply sublime.
Not only will it leave your baby feeling soft and pampered, but it’s also a perfect opportunity to take some adorable pictures. Let your baby enjoy the calming waters while you snap away. With the right props and ingredients, you can create some truly unforgettable memories.
Ready to create this whimsical photo opportunity at home?
Keep on reading.

This post is all about DIY baby milk bath
This post may contain affiliate links, which means I’ll receive a commission if you purchase through my link, at no extra cost to you. Please read full disclosure here.
How do you make a homemade baby milk bath
Gather your supplies
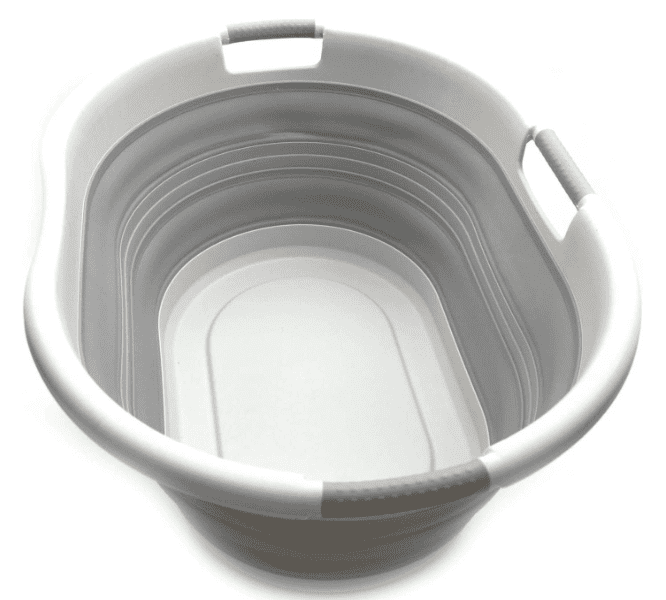
Milk bath tub for baby
Any bathtub that is big enough will do. When I filmed this milk bath, Madi is already a 2-year-old toddler so I had to find a deeper tub for her (we don’t want to show our kiddo’s private parts @@).
This collapsible basket fits all the requirements! It’s sturdy and deep enough, and I can use it for other purposes.
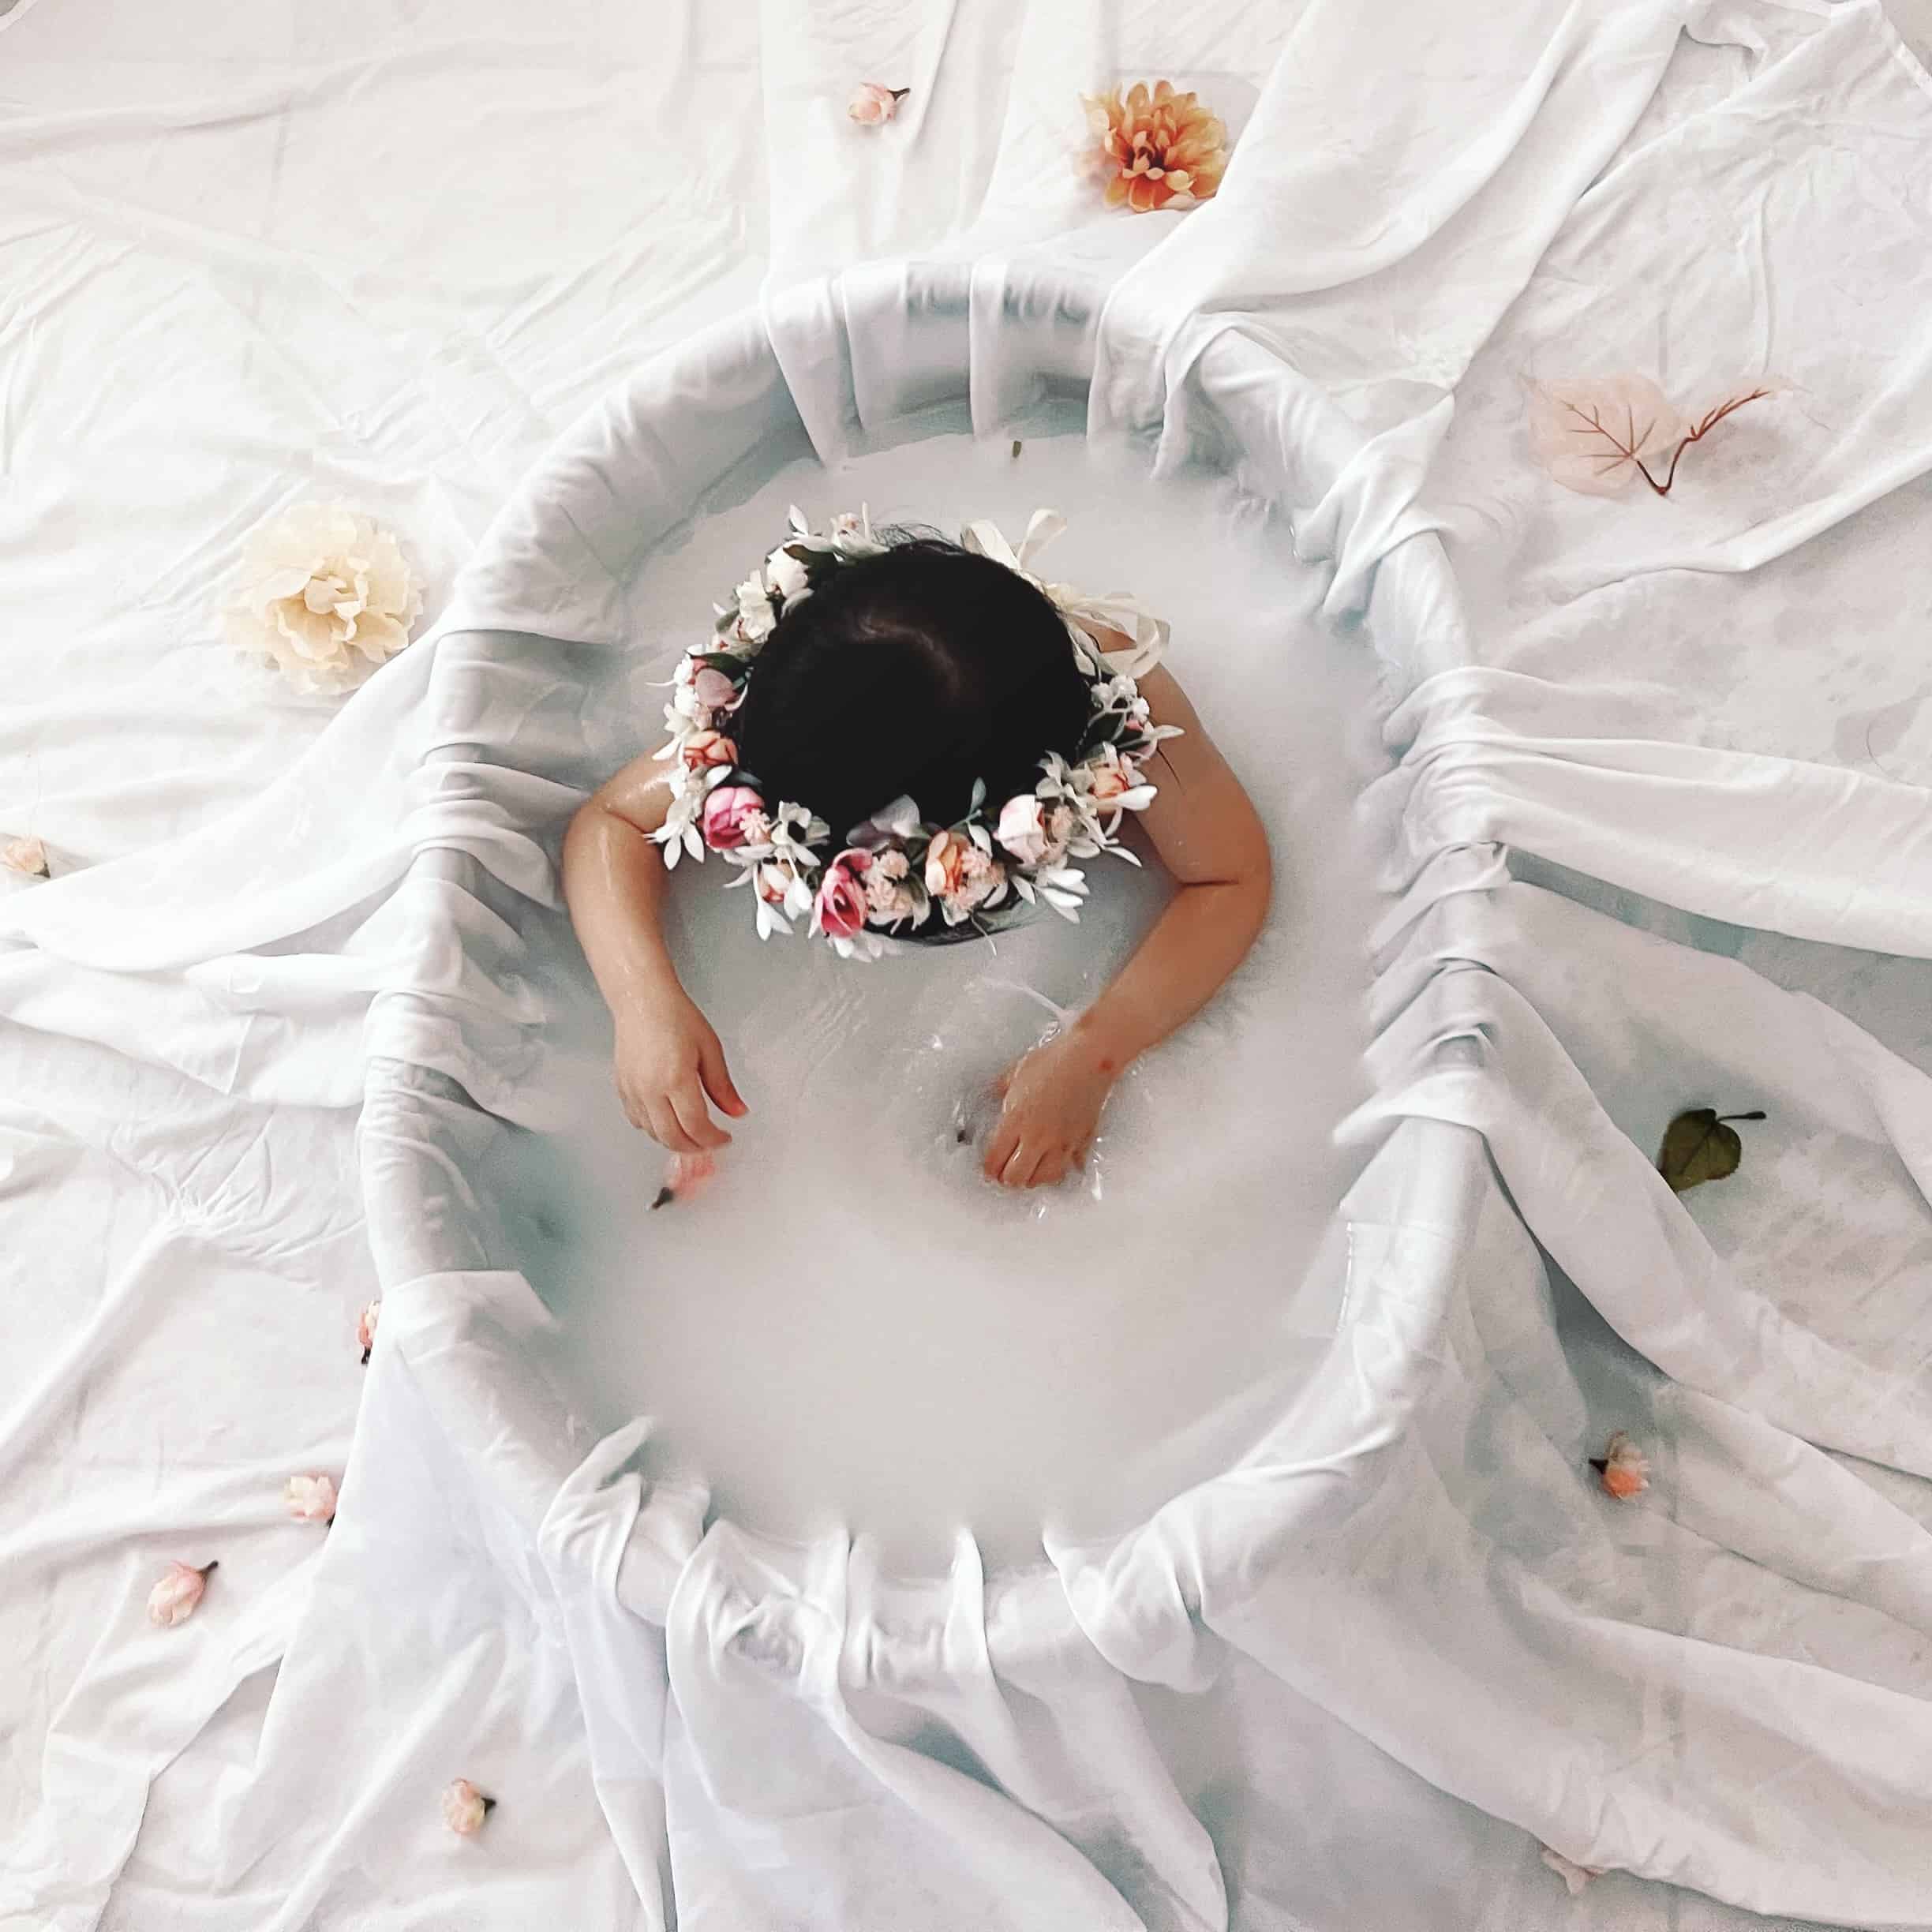
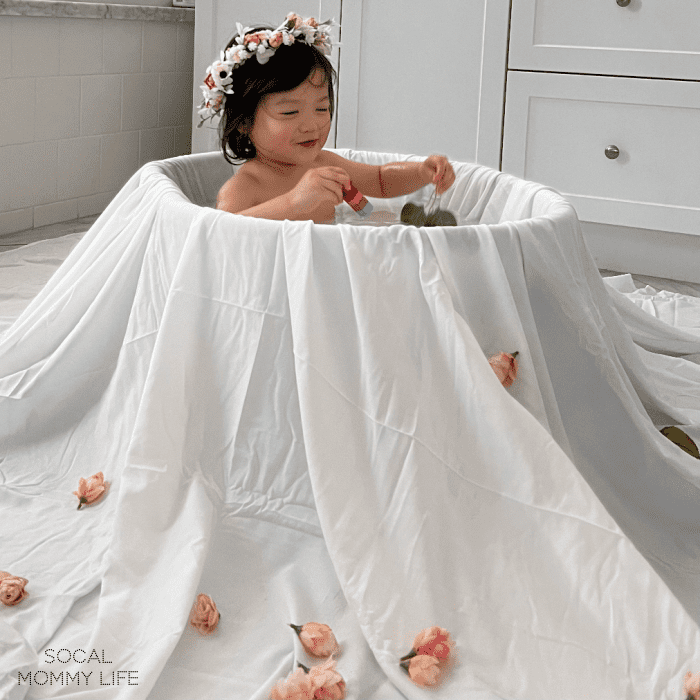
A King-sized flat sheet
Unless you have a picture-worthy bathtub, covering your bathtub with a flat sheet makes a great foundation for your photography session.
Milk
I used whole milk, but you can use whatever milk you like such as coconut and almond milk. Whole milk is my best choice because it’s denser and whiter.
To make the best pampering soak, you can experiment with other types of milk too. Coconut milk is moisturizing and anti-inflammatory, while almond milk soothes the skin.
Bath soak for extra moisturizing power
Adding bath soak is optional but highly recommended. Your baby will be bathing already so why not make it an extra pampering experience.
Baby Madi has eczema and a soak of Cocosoak provid the much-needed relief. This all organic bath soak is designed to hydrate and treat irritated skin while also providing a protective barrier to prevent irritation and inflammation.
There’s no filler, or anything to just “smell nice”. This magic soak only contains the best, purest ingredients like coconut oil and colloidal oats.
Not only does it provide relief to Madi’s eczema, my skin feels silky soft after bathing in it too!

Florals, greeneries, and fruits
I wanted to create a pink floral DIY baby milk bath session, so I opted for flowers and leaves. I bought a bunch of seasonal flower and realized that it’s not enough so I supplemented with some faux flowers.
I’d say if you’re going after a floral themed milk bath, get at least 3 bunches of flowers and greeneris. Fresh flowers from your organic garden is always the best. But if you need to purchase them at the store, be sure to rinse first to get rid of pesticides.
Depending on the season, you can get creative on the baby milk bath theme too.
Have fun with baby milk bath time during the summer months by using citrus fruits like oranges, lemons or berries. Add in some fall flavors like mini pumpkins and gourds to make it more cozy. If you want winter vibes try holly stems along side pines which will create that perfect holiday feel!
Step by step instructions for DIY baby milk bath
1. Safety first
When you’re planning on doing a DIY baby milk bath session at home, it’s important to be careful and take all the necessary precautions. First of all, make sure that the water is not too hot. You don’t want to risk scalding your little one. Also, always be next to baby when they’re in the tub. This way you can prevent any accidental drowning. And finally, be very careful when placing baby in and out of the bathtub. The floor might get wet and slippery, so take extra care not to slip or fall.
2. Place the bath tub in the middle of the room
You’ll be taking pictures from many angles so placing the bath tub in the middle of the room will avoid capturing things you dont want.
3. Drape the flat sheet over the bath tub
Press the flat sheet down in the middle of the tub. You’ll want to create space for the water and milk when you pour into the tub. Be sure to stretch out the flat sheet outside of the tub.
4. Pour in water and milk
Fill 3/4 of the tub with luke warm water. The water can be slighly warmer as you’ll be adding in cold milk later. Now, add enough milk water until the desired milky color.
5. Decorate with fresh flowers, leaves, or fruits
You can put your baby in the milk bath before you drop in the decorations or after. I put Madi in her bath first becasue I want her to have fun watching me drop in the flowers (hey, you know how hard it is to snap a picture of a toddler smiling 😄) Oh, and don’t forget to leave a few pieces outside of the tub!
6. Take lots of pictures
Here comes the fun part! Get creative with your angles- try shooting from above, or at different depths. Be sure to capture baby’s expressions as they experience their milk bath! You can have small toys on hand to help keep your baby entertained during the shoot too.
Last thing you need to know about DIY baby milk bath
So there you have it! A DIY baby milk bath that is easy to make and won’t break the bank. Be sure to let me know how it goes in the comments below, and if you come up with any other variations or themes I would love to hear about them.
This post was all about DIY baby milk bath
DIY baby milk bath related posts
- Baby Eczema Itch Relief: The Beginner’s Guide
- Easy DIY milestone onesies
- The Only Ferber Method Guide You’ll Need To Successfully Sleep Train Your Baby